Showing posts with label custom. Show all posts

Friday, July 01, 2016

Equipment - An Old Friend Returns (Brancale Giro helmet)

So an old friend came back into my life the other day. It's a 1983 or so Brancale Giro helmet, the "aero" version of the ubiquitous Brancale helmet out there at the time, the Sport.

I rediscovered the helmet out of the blue, really, because I didn't realize I didn't have it. I mean, okay, I'd looked for it briefly here and there and couldn't find it. I was trying to set up a series of posts on the helmets I used to have. I'd naturally start with my first real racing helmet. Thing was that it was so bizarre and off that I usually kept it separate from the helmets that actually saved me from injury - those are stacked in the bike room, all bashed and cracked. When I couldn't find my first real race helmet I just figured I put it "somewhere else" and figured I'd look again "later". I repeated this a few times while living at the old place and then a few more times after we moved up here about 10 years ago.

Then it appeared in the mail, absolutely and totally unexpectedly.

Wowsers.

So to give you an idea of what I'm talking about, here's some info.

Brancale Giro in stock form, from eBay listings:

Stock front Brancale Giro helmet.

Stock rear Brancale Giro helmet.
I distinctly remember removing the red/green Brancale decals.

The Brancale Sport helmet, which many riders had, from here:
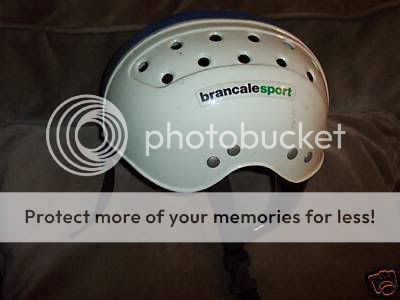
Many of the Sports I saw had a blue sticker over the top.
I remember these as "the white and blue helmets".
Note that these have twice as many metal rivets. I probably thought that it'd be better to have fewer rivets.

The Brancale Giro is about the thinnest, most fragile helmet you could possibly imagine. From what I can tell it's made with ABS plastic and it has some comfort foam pads, like the ones inside normal helmets to pad the styrofoam.

There is zero crush zone in this helmet. If it was a car it'd have a zero star crash test rating.

Case in point. One of my first bike mentors, I think it was Tom (or Ken, but I think it was Tom), he and I did a training ride where we finished by doing a sprint.

It involved hammering down the main road in our town, a pretty big artery road. We'd normally wind it up just before the high school which had a crit-like two-90 degree bend one-way driveway. We'd fly into the first 90 degree turn off the main road, accelerated down the short, 2 lane, one way 100 meter straight there, blasted into another 90 degree turn, then sprinted along the three lane, one-way, 120 meters to a crosswalk over the driveway. It was a perfect way to practice a two corner crit finish while at the limit and in a somewhat controlled environment.

The problem was that on that day we came around the second corner and had to slam on the brakes. A wall of school buses blocked the way. Apparently there was some after school activity requiring a dozen or so busses and the parked buses forced us to slow to a walking pace.

We threaded through the buses and crossed the road at the end of the driveway, rolled into a parking lot, climbed off our bikes, and sat on a wood fence lining the lot. Tom (or Ken) theatrically hit his helmet on one of the wood fence posts, a light hit, expressing his frustration at this whole miles long effort to get to the "final two turns" only to be thwarted by the unexpected busses.

Crack.

We both jumped, startled.

His helmet tap had cracked the thing straight across.

He looked up, now more glum than mad.

"I guess I need to buy a new helmet."

Or, as the case may have been, just glued it back together, because that would have been okay back then.

1984 Uniroyal Training Series, in Southbury or Middlebury, CT.
I'm wearing the Brancale Giro.
The other guy, Nathaniel Ruhlman (younger brother to Paul Ruhlman) is wearing a Brancale Sport.

When I started racing I had gotten the "aero" Brancale Giro, over the ubiquitous and hockey-helmet looking Sport. Even back then I really enjoyed geeking out over the technical stuff. I dreamed about owning a Miyata-Aero road bike (in 1983!). I wanted ovalized tops on my road bars, available at the time, and only got them a few years ago when I got my FSA Wing Compact bars. I wanted aero wheels in 1984, after Francesco Moser blew away the Hour Record using disk wheels, and my dream was to have the first set of tall profile wheels I'd seen (not Zipps, I can't remember the brand, I want to say Aero-something or something-Comp). 

As far as helmets went it was all about ventilation because in those days ventilation was a significant problem. I thought that it would be beneficial if I had more ventilation in my helmet. I couldn't afford a Dura-Ace AX group or an aero Miyata bike but I could increase ventilation in my helmet - all it would take is a sharp knife and some time.
Therefore I enlarged the vents already there while adding four more vents (two on each side up front).

I remember thinking as I was carving the vents, "Okay, I think that's about it, I don't think I can take more out without weakening the helmet."

Heh.

Now I look at my cut outs and think "Wow, every corner is a stress raiser!"

I was also in some Rising Sun stage of my life and I wanted to put the Rising Sun on my helmet. I didn't realize it wasn't really a good thing, but at the time I didn't know. It's not quite as bad as putting a swastika on your helmet but it's sort of similar.

I asked my mom to write down the Kanji for various words. I don't know the list (I'll have to ask someone that knows Kanji) but I think they were things like Speed, Strength, Victory, Endurance.

Bike race things.

I even used my primitive sewing skills to embroider the strap with my name in Kanji.

Then, for two years or so, I raced the helmet. Its time came to an end when the USCF passed the helmet rule where the helmets actually had to work. I believe that was 1986.

Right side.
My Rising Sun wasn't planned well so this beam had to end abruptly.

You can see the two extra vents, compared to the stock Brancale Giro at the top of the post. You can also see how big the vents got. Big is relative, of course, but compared to the helmet up top the vents are like the "bold" version of the "normal" vent.

Does that make sense?

Front.
Note that the two outermost vents in the front were hand cut.
All the vents were enlarged.
My name in the front, as the "head badge" if you will.

I cut the center vents pretty deeply. I debated cutting vents across the middle but I was doing all the cutting with an X-acto knife and it was very slow going opening a new vent. Therefore I nixed the idea of adding two more vents in the center.

The "good side".

The left side was where I hand painted the Sun part of the Rising Sun. It's what I'd consider to be the good side. Again, note the vents.

I vaguely recall enlarging the vents on one side only, riding outside, and "comparing" the difference in ventilation from left to right.

I'm sure there was a substantial difference.

Right.

The Back.
All vents were enlarged.

In the back I knew I needed to let the air out. Therefore I enlarged the vents a bit. However, after all the agony of adding vents to the sides, I decided to leave the vent count alone.

"Kamikaze" is not really an appropriate thing to put on the helmet. I wouldn't do it again.

Close up.

I'll update when I know what the Kanji means.

The rear.

You can see my attempts at neatening up the red beams. The helmet faded, exposing the white touch up paint. It was all hand painted. Since I built a lot of plastic models, generally in the 1/72 scale range (so a tank was a couple inches long, a big plane might be 10 inches long), I only had small paint brushes. It wasn't an ideal way to paint a helmet.

My name in Kanji

I wonder if anyone does this. I forgot I did this until I saw it. Makes me want to do it again.

The inside.
In this picture the right two vents I carved out, and all of them got enlarged.

You can see the rough cuts, my attempts at making the cuts the same angle, etc.

The foam padding is all the padding in the helmet. Soft foam, not structural.

Rear vents. Again, enlarged.

The rear vents were shaped to the outside, not inside, so they didn't look as big from the  inside. I remember convincing myself that the larger vents made a difference.

Carving the vents was sort of a cathartic thing. I'd sit at home and carve out the vents a bit more before some of the big races because "another millimeter of ventilation would help". Or, probably more accurately, another hour of me sitting quietly and carving my helmet would calm me down a bit and help me focus.

The other evening, when I pulled out the helmet, the Missus asked me to put it on. She cracked up when I did, so I had to run to the bathroom to see what I looked like. It was a bit ridiculous because it fits so closely to my head. Aero, though, I have to admit.

I went back and joked to the Missus that I should put it on and roll up to the start line of a race, just to get a reaction from people.

Then I realized I'd be fined for not wearing an approved helmet while riding a bike.

Ah well. I think it'll go into my glass door bookshelf, where I have my various bike trophies on display. I'm not one that has a lot of trophies so luckily (?) I still have room.

I'm glad circumstances allowed me to reunite with my first real racing helmet. It was obviously very personalized, I'd put a lot of sweat equity into it, and really, when I saw it again, it felt like I'd reconnected with an old friend.

Monday, October 15, 2012

Equipment - Aero Benefits

In the past I've extolled the virtues of aero road bikes. I felt convinced that aero road bikes would sweep the peloton. In a few years I expected everyone to be using frames with internal cable routing, somewhat built-in stems, and integrated brakes.

I went as far as to order a frame from Tsunami Bikes that I thought would fulfill some of the things I thought important. I couldn't get integrated brakes on my budget, nor could I get some cool faired stem-fork deal, but I could do a few things.

First I got narrow tubing. I later realized that I have such a small frame that the tubing really wouldn't make that much difference but if I was going to get an aero frame I wanted the tubing to be narrow.

Second I got a rear wheel cutout. It may not make a huge difference with a direct headwind - in fact I highly doubt it - but it should make for a better sail in a crosswind. I figured that in a cross tailwind it'd be even better. As a bonus I could get really short chainstays because I wouldn't be limited to what room the tube left the rear tire.

Thirdly I got internal cable routing. I dealt with such things enough in the bike shop days so routing cables and such isn't such a pain (although I probably wouldn't have agreed with you the first time I installed a front derailleur cable. The shifter cables travel through the downtube and the rear brake through the top tube. I had no "through fork" method for doing the front brake cable (like for BMX bikes) so that cable hangs out in the breeze.

(I have to admit the main reason I got internal cables is that it's much, much, much easier to clean. I read somewhere that a foot of exposed cable housing costs about one watt. With my very small frame I have maybe 2 watts of drag due to cable housing. That's not a lot. If I had a 35 inch inseam I might have approached things a bit differently.)

Fourth I got an integrated seat post (or ISP). I knew and forgot that BH bikes "invented" it. I think it has its place but what I have is more of a style thing. I think that a shaped ISP has its place, able to significantly reduce shock while presenting a minimal profile to the wind. My ISP does neither but it looks cool so I did it.

Finally I had the frame built with only secondary consideration for the water bottles. I knew that my frame thoughts gave me only "fine" benefits. This is significant so I'll explain why.

In the early aero days things were so conservative that a 16 mm tall rim was considered "aero". Seriously! Nowadays a 32 mm rim would be called "really conservative". When disk wheels and then tall profile rims burst onto the scene they gave tremendous benefits over things like a 16 mm tall "aero" wheel. You could save many minutes in a 40 km TT by using a true aero wheel like a Specialized TriSpoke (with HED selling the wheel, with a slightly modified rear hub, as the HED3)

I call that a "coarse benefit". What's the point of quibbling over a second or two when you can save 4 or 5 minutes? Suddenly aero brake cables (some were still being routed up in the air) seemed kind of minor. Aero wheels would make a huge difference.

I realized this a long time ago and used the TriSpokes in races where I expected the pace to be flat out all the time. In tight crits I would use my normal superlight 28 spoke 280/330g tubulars, but by the mid 90s I had a slew of aero wheels at my disposal - the TriSpokes, Zipp 440s (pre-404s), Zipp 340s (pre-340s), Spinergy Rev-Xs, a rear disk wheel (17 mm wide rim prototype and extremely light), Campy Ventos (all aluminum rim aero wheels - they were tanks), and finally my first aero wheelset, the 16 mm tall Araya ADX-4s.

Not everyone seemed so openminded, especially at the pro level. That held true for a long time. Even in the mid-90s most pros didn't use significantly aero wheels. Spinergy made some inroads with the Mapei, Rabobank, and Polti teams, with some very, very good riders on the wheels. Next to those wheels the relatively primitive, full aluminum Campy wheels looked heavy and outdated.

Then Mavic hit the pro ranks with the Cosmic. Aero wheels were still not totally accepted but some of the better Classics racers used the Cosmics to great effect. Well that and doping apparently, but still, if they were all doping then the aero wheels would help make a difference.

Finally Zipp hit the big time with CSC. After a year or two of disasters (wheels breaking on the cobbles usually) Zipp could boast some major tough victories on their wheels.

Now everyone uses aero wheels. Not only that, everyone uses pretty tall aero wheels. A lot of riders use rims initially meant for time trials in road races - the 80 and 90 mm tall rims.

That's great except for one thing - now everyone had to have aero wheels just to be even with the others. This means that any benefit from one wheelset to another, if they're both aero, will be minute. The very coarse benefits of aero wheels, the minutes saved per hour, have now become, between similar aero wheels, mere seconds.

Now the benefits are "fine benefits", minute ones. Got it? Good.


So what's that got to do with aero road frames?

Well, aero road frames, at least ones reasonably well designed, offer a small benefit over non-aero frames. Within the aero frame market though the differences are barely measurable. Velonews found less than 10 g difference in drag, about 10 watts worth, spread across four frames (if my word problem logic skills are correct - 4.3 g spread for the 2nd - 4th frames, 5 g spread from 1st to 2nd frame.) They claim a 20 watt difference from their control bike, a wide tubed Masi with Cosmic wheels.

The benefit seems pretty small when you stick a rider on the bike, a computer on the bars or stem, and, wait for it, waterbottles on the downtube and seat tube. Suddenly you get a whole bunch of things that coarsely affect drag. Yes, a seat tube bottle has been show to be more aero than not having one at all, but if you have a rear wheel cutout and a very aero rear wheel, I think that a bottle won't help much.

Regardless it's beyond dispute that a bottle on the downtube really screws up the aerodynamics. Cervelo, in their top of the line time trial frames, integrated a bottle into the frame shape, essentially proving that sticking a bottle on the seat tube is not the ideal solution for frame aerodynamics.

Therefore, although I detailed all sorts of things I did on my aero frame, they were all "fine" benefits. Minute. Probably not measurable.

Except for the bottles.

I decided that I'd race with no bottles at all. Instead I'd use a CamelBak for that year (2011). I figured that the little hump on my back would help with aerodynamics, filling in the space behind my helmet, and the bare frame would be more efficient slicing through the wind.

I hoped for a somewhat coarse reduction in drag. Not a lot, not the 2 or 3 mph that I see at high speed with aero wheels, but maybe just enough to save me 5 or 10 or 15 watts average in a race.


My "aero" frame. Note no bottles - that was my "coarse" benefit.


The thing I wanted to do was to reduce my average wattage just enough to give me a sprint. All too often I'd waste myself in a race just hanging on for dear life. I'd get to the finish having averaged 190 or 200 watts and have absolutely nothing left.

On the other hand if I finish the race with an average wattage under 180 I've usually done quite well for myself. Under 170 and I probably did really well.

My goal was to bring the 190 watt races into the 180 watt range. This would allow me to contest the sprint and get a place.

Pause for a bit to catch your breath.

(Jeopardy theme song)

Okay, let's keep going.

Today I realized something. All this is "fine" benefit stuff. The bottle idea was a more significant fine benefit but it was still a fine benefit. I realized this because of a couple things.

First, I've noticed a lot, and I mean a lot of racers who look like they're on a 3 speed bike when they're in a race. They're up in the air, they're on the hoods, they look like they're rolling down the boardwalk to pick up the Sunday paper. I almost always hold my tongue when I see this because I was told a long time ago not to offer advice but to wait for someone to ask for it. People who spontaneously gave advice usually didn't get received well since the advisee wasn't necessarily ready to hear said advice. The problem with the 3 speed position is that it's really upright and catches a lot of wind. It's not aero, and it's way worse than having a non-aero frame. You can't buy your way out of an inefficient position, not with wheels or a frame or anything. It's just bad.

Second, the riders I fit have done well. I have never had the opportunity to fit someone using a powermeter but I did fit a few riders using a trainer to make sure I was in the realm of reality. The racers I fit showed immediate improvement. My fits tend to be the same kind of thing. I couldn't describe it technically but I always found I did the same thing for each rider - extend them, drop the bars, usually raise and move the saddle forward. Basically they went from looking like a rider going to pick up the Sunday paper to a rider that looked like a racer.

I knew each rider would be better but I couldn't tell you why.

Now I can, for a couple reasons.

First, I read somewhere that Michele Ferrari told Armstrong to raise his saddle 2 mm, in order to flatten his back a bit. I thought, okay, come on, 2 mm, that's nothing, that won't do a thing for your back.

Then I remembered that when I put the 170 mm cranks on my bike and raise my saddle 5 mm, it feels like a new bike. I'm much lower in front, my back is that much more comfortable, and I can roll along just a touch easier. I never really quantified it so I just dismissed it as a minor benefit to 170s (and it was a reason I tried sticking with the 170s for a year, then for a summer, before finally giving up and going back to the 175s. The position was great but the long crankarms were an even more coarse benefit.)

Second I had a chance to sort of quantify why the 170s felt better. I saw this site today, for the first time. Don't mind the 1995 graphics. What's important is the link to "Real Customers, Real Results + Improvements". Take a look at what the riders look like before and after. Before - they look like what I described above - a rider on a 3 speed.

Okay, maybe not that bad, but look at any random picture of you (meaning you, the reader) in some random ride/race this year. Look at the picture with a discerning eye. Look at your back, look at its angle toward the lower back area. See how your hips are sitting on the bike.

Now look at the "after" pictures on that site. See how low their torsos are? See how their arms extend forward? See how their hips are angled forward on the saddle a bit?

They look pro now. It's not just a look though. Look at the numbers, how much wattage they're saving, how much faster they can go. It's incredible, the changes. Even an experienced racer saw a huge improvement in performance. Body positioning gives you a tremendous benefit - it is the biggest of the coarse benefits.

Finally, I saw some article somewhere (forgive me for not linking, I've followed so many links recently I have no idea where this was) where someone gave the benefits of a time trial frame, helmet, and wheels. The main benefit came from the frame but not because of the frame itself but because of the position.

Aha!

This is where all this starts to come together. I know that I know how to fit a rider, within reason. I couldn't even describe what I was trying to do, I just did it. Now I know that I fit a rider in order to tilt their hips forward, let them open up their hip angle, get their back more flat, drop their shoulders and arms, and get their head tucked in a bit more. The pictures from that wind tunnel site really illustrate the kind of results I would go for when I fit someone.

Next, the wind tunnel site quantified for me the savings on the position. They even comment somewhere that aero helmets are aero helmets, probably like aero wheels are like aero wheels. Get something in the right family and they're really close to one another.

At the same time the site illustrated to me that aero frames aren't where it's at. Aero frames may help incrementally but without a good rider position the frame won't be significant. In fact it's probably more important to get aero wheels, maybe some other aero stuff - flattened bar tops, even more aero shoes - before the aero frame becomes important.

So it's position. And position, for most of us, is pretty easy to adjust.

For me, not so much. I have limiters - I have short legs so my preference for 175s means I end up with my saddle back just a touch more than I prefer. I end up with my hips tilted up just a touch more than I prefer. And therefore my back isn't quite as flat as I like.

(I should point out I have a bad back and the flat back really feels comfortable. The other week I got on the bike specifically to help my back, it was really hurting for a few days. The ride really helped it feel better, and I was on the drops virtually the whole time. Another thing for people to open their minds to - the idea that a flat back could be more comfortable than one that's elevated a bit.)

I have been thinking of a third Tsunami, primarily to explore the use of compact drop bars. I really like the FSA Compacts but they're 3 cm shorter in reach and 2 cm shorter in drop. To fit me properly I'd need a 15 cm stem (not happening) which drops 2 cm (especially like that). A longer frame by say 2 cm (and a 13 cm stem instead of a 12 cm, to keep weight over the front wheel) would be good.

The drop presents a problem. The headtube is already as short as possible. With the Chris King InSet headset I could drop the stack height just a bit but I'd want to drop it about 2.5 cm, 2 cm for the bars and at least 0.5 cm for the cranks (since I like it when the saddle is 5 mm higher). The only way to get this extra drop is to raise the rest of the bike, i.e. the bottom bracket. That's not ideal but it would definitely work. A track stem would give me about 1 cm drop.

It's definitely just a gleam in my eye but the idea with this third evolution frame would be to hone body position. It's not as important to have an aero frame (especially for a frame with a 9.5 cm headtube) but having my body position adjusted a bit would really help.

Because on my bike now even I look a bit like I'm out for a stroll to pick up the Sunday paper.

Wednesday, June 06, 2012

Tsunami - 1.0, Take Two (1.1?)

A while back I got that first wonderful custom-fit frame from Tsunami Bikes.

It changed my world.

That year I found I could train longer, race harder, and, for the first time ever, managed to get a Cat 2 upgrade.

Even so I found a few details that I could change. The biggest was the chainstay length - with a front end so much longer than before, the geometry unweighted the rear wheel significantly. I found that going through corners under power I could almost always break the tire loose. On particularly fast laps I could break the tire loose even without pedaling.

Okay, fine, I could move my weight back a bit and anchor the rear wheel more, but after seeing a few pictures of me cornering I realized that it would be better to bring the wheel closer in to the bottom bracket. If Mohammad can't go to the mountain, move the mountain to Mohammad.

This led to the second Tsunami frame, the black one. Although its aero styling made it look different, it fit exactly like the orange frame. Out back, though, the stays were shorter. 39 cm for the chainstays to be exact, the shortest the builder could do without massive tire rub.

It's tight. I'm going to file/sand it down a bit.

(I get some pretty horrendous sounding scraping going when I ride over sand and such - the sand sticking to the tires scrapes the frame, jamming into it. I can feel the grit jamming my tire and frame, slowing me down. It's that tight.)

The second frame gave the nod to aerodynamics over weight. I asked for it with the thought of running just a CamelBak, i.e. no bottles, and trying to get more aero by eliminating the big clunky things in the frame. Real world experience led to me installing two cages - my aero bike experiment failed, mainly because I found it so cumbersome to take a sip of water with the CamelBak on.

The experience made me look at my lighter (by over 200g) orange frame with a different eye. I wanted the slightly lighter frame back but with the shorter stays.

This is where Tsunami Bikes made the difference.

Joseph Wells, the welder behind the name, agreed to modify my frame with shorter stays. He'd have to cut off and replace the seatstays to accomplish this, in order to relocate the brake bridge. He would be sending the frame back unpainted (I asked him to strip off the rest of the paint).

Just unpacked after it arrived.

After several weeks I got the frame back. Shorter stays, no paint, and looking admittedly a bit sad. No glowing Candy Orange paint, no decals, no battle scars.

 I weighed it out of curiosity. Without a rear dropout, without the cable adjusters, no bottom bracket cable guide, the frame weighed in at 1210g, a full 230g lighter than in its original form. I'll weigh the small pieces but I don't think they'll break 50g, leaving the frame at about 200g lighter. I'm guessing the shorter tubes will count for about 40-60g (based on the 30g I saved by cutting down my heat treated aluminum bars), so the luscious paint probably weighed about 150g.

After talking with a few people I decided to make some unauthorized changes to the frame. I started by drilling holes in the bottom bracket shell, swiss-cheesing the dropouts, and even the back of the head tube. I also honed the inside of the head tube and bottom bracket, thinning the tube diameters. Finally I acid etched the tubes with muriatic acid to thin them out.

(pause)

Okay, I didn't do any of that.

I did start filing down some welds, shaping some of the cable stops, and and basically trying to get rid of any superfluous material. I gained a new appreciation for the artisan frame builders; I also realized that I could do this shaping stuff for a long, long time and not be satisfied until it was perfect.

(I realized I was paralleling another rider's experience, albeit in a slightly different way. When Chris Boardman was laid up for a while after breaking a bunch of bones, he whittled away at a Mavic crankset. It looked beautiful when he was done but, based on seeing and feeling others done the same way, it was probably super-flexy. Nonetheless the idea of "honing" a finished product appeals to me in some way, I guess the same way I want to mod a brand new car.)

I've been filing a little at a time, after my trainer rides, maybe once a week. I weighed the frame after a few filing sessions - 1190g, or 20g lighter than before. I wanted to get rid of any excess weight but not reduce strength. I even looked at pictures of the frame bits before they got welded (I looked them up) so that I'd have an idea of what I was working with.

A friend happened to be painting his Mini a bright red color. He is doing part of another project for me, and when I realized he was painting yet another Mini (this is his fifth one), I asked if he could maybe shoot some paint on my frame. Since I had to work around his schedule I had to accelerate mine - I dropped off the frame at about 80% complete.

My friend promised me some miracles, using a really heavy (gulp) primer that puffs up and fills stuff out. He'd then sand it down. I must have looked a bit alarmed because he looked at my face and mentioned that he'd try and keep the weight down.

(On an aside I realize now that I could have spent months filing and sanding the frame, and if I were selling the thing under my own name I'd feel somewhat obligated to do that if the finish was an issue.)

With Junior occupying my time a bit, I kinda sorta forgot about the frame. Then I realized, oh, he's probably done with it. I went to call him and saw that I had a missed call on my phone.

From him.

"Dude, your frame's all set."

I headed over.

With Junior in the car too, of course.

 Frame hanging up.
Mini is in the background, with "Actual Size" already in the window. Right now he's doing the jambs and stuff, the stuff that isn't visible until you open doors.
Painter is off to the right.

My painter friend said he brushed on the primer around the joints so as not to spray too much of the heavy stuff on the frame, then went over it with a bunch of different sandpaper, then shot the whole frame. I haven't weighed the frame yet so no report on the total paint weight.

I had to take this shot. Expo Wheelmen's sponsor Manchester Cycle sells Bell helmets, and because of Expo I now race in a Bell. That Bell sticker is on the Mini.

The frame is now red. It happens to be a Hyundai color (I think).

Originally my friend was going to paint the mini a Viper red. Even though that would have dovetailed nicely into my "what car should I buy" post because I briefly contemplated a Viper, ultimately it was his choice. If he picked yellow my frame would be yellow.

 Note the smoothed out welds.

 I also filed away at the base of the cable stops. I wanted them to be more "formed" than just triangular blocks.

 Another view of the front end, with the formed cable stops on the downtube.

 The bottom bracket got cleaned up a lot.

So did the welds around the rear drop outs.

The Missus said "Wow" when I opened the door holding the frame. I'm psyched to build it up now. I have all the frame's small parts downstairs (dropout, seatpost collar, stuff like that), a lighter fork, and the actual parts kit. I also have a second SRM crankset, including the special 104mm spindle, for this frame.

I hope to incorporate a couple pieces off other frames - I have a Ti seat collar, for example, that I'd like to use.

We'll see how it goes. It's not that I don't have the stuff to put the bike together - it's just finding the time that'll be the trick.

Wednesday, November 25, 2009

Equipment - Dream World (Custom Frames)

For the longest time I've wanted a custom frame. At first it was because I wanted to get a frame that was especially designed for me, for my needs. I had no idea what that meant, but I wanted a frame that was, well, unique.

As I learned more and more about bikes, I started dreaming of some of the extreme bikes I saw in bike magazines. The one that really caught my eye was a specialty crit bike. This thing was insane, with super steep angles, high bottom bracket, and, get this, such a short chainstay that the tire wouldn't clear a normal seat tube.

In fact, it wouldn't even clear a grooved or indented seat tube.

Therefore, in order to make the thing work, the builder put two chainstays in place of the seat tube and stuck the rear wheel through the opening between them.

(To my ultimate badness, I cannot remember the name of the framebuilder of this dream bike. He was featured in Bicycling and one or two other magazines in the early 80s... Anyone?)

Back then that was the absolute schnizzle, the top of the heap when it came to US style bikes. No laid back positions here, no mid-foot cleats (or so they appeared), no traditional lower saddle heights. This was an era of change, inspired by wind tunnels and such.

At that time Lemond rode on his tippy-toes on his bike (and won the '83 Worlds like that), his teammate Marc Madiot rode 180s to a stage win (and he rode a 55 cm frame), and "aero" became the new catch-phrase.

So in this age of change, of innovation, and in my time of "exploration", I dreamed about land speed records and crit bikes in alternate fashion.

Of course, like slot cars and Lamborghini Countachs, things which I dreamed about literally for decades, the dreams remained dreams.

Then some surprising things happened. Over the course of 15 years, two friends invited me to sit in Countachs in their possession. I even got a ride in one. I have to tell you that no one could wipe the grin off my face after those magical moments. The drive, holy smokes, that was crazy insane.

Then reality sunk in.

Although it's all exotic and all that, I've realized that the Countach has the aerodynamics of a brick and a cobbled together engine. Seriously. They used layered cylinder head gaskets to increase displacement, and they regularly provided significantly up-powered cars to journalists so the cars would be fast "in print".

As it is, my blue car is faster than a Countach. Less powerful, yes, but faster. And it has almost-as-wide tires (the Countach had the widest production tires for a long time). But, still, as dreams go, if you offered me a chance to drive a Countach... Look, just count me in, okay? I'll work out my schedule and fit in a Countach drive.

Then, a couple years ago, the missus (and her mom) got me a beautiful slot car set, with F1 cars even.

And now I'm starting to think about the possibility of seeing through that custom frame dream.

To be frank, my frame dreams have evolved over the years. At first it had to do with short wheelbases and insanely short chainstays. Later, as I realized what I'd been missing on my smaller-sized frames, I started dreaming about more normal things, like a 73 degree head tube angle.

On a short frame like mine, my shoes (and toe clips) would hit the front tire when I turned the bars. In order to avoid such contact, manufacturers would use slack angles and lots of rake. This reduced foot overlap but resulted in lazy, pain-killer haze handling. Once I realized this I wanted to experience a more responsive front end. Steeper angles and a normal rake, in other words.

Those head tube angle dreams then morphed into top tube dreams. My ape-like stance, with short legs and long torso, made it necessary to use a short seat tube, but my torso forced me to go with long stems. On the 50 cm frames I rode forever, I typically used a 14 cm stem, then a 14.5, and just before quill stems withdrew from the spotlight, I briefly contemplated using a 15 cm stem.

For me, a 51 or 52 centimeter top tube seemed short. I could sit comfortably on friends' 54-56 cm bikes, with long stems and everything, and the reach felt reasonable, even comfortable. But my feet dangling a couple inches above the pedals, I couldn't fix that part of fitting myself to their bikes.

I thought maybe a 55.5 cm top tube would be the best I could do. I bought a size M Giant TCR, with its 55.5 cm top tube. As a bonus it had a 73 degree head tube angle, or something close to it.

The bike felt great, my arms finally doing something other than dangling downwards, with a reach about 3 or 4 cm longer than before. I could steer while hammering out of the saddle, thanks to the steeper head tube angle.

But the dream rapidly crumbed. The head tube was too long, the bars too high.

I experimented with bar positioning, now emphasizing height as well as length. After some convoluted calculations, along with a bunch of Sharpie marks on my bright yellow frame, I decided I could ride a size S Giant just as well.

I moved to the size S, happy with the lower bars. They made a huge difference in my sprint, but they felt too close.

In a fit of "fulfilling a bunch of other stuff", I bought my current steed, a Cannondale SystemSix. Now, if I was someone like a Bennati, I could just get a custom version of my frame. Talk about a dream bike for me - a 52 seat tube with a 58 (!!) top tube!

But I'm a lowly Cat 3, and even with some begging and pleading, I couldn't score the most blemished, unrideable Bennati frame.

I priced out and contemplated a lugged carbon tube kit, a Dedaccai-made "kit", but the bottom bracket-seat tube angle on my long, low frame wouldn't work with their stock sizes. Fortunately, as it turned out, because the lugs in these kits failed regularly. When I heard this I went to my now-unused "carbon frames" bookmark list and found that virtually all the bikes I'd bookmarked had disappeared.

No one wanted to admit to making such a frame.

Dedaccai ended their kit production, now making only full frames, or at least front triangles.

So, for the last year or so, I meandered aimlessly in the frame geometry jungle, looking for that perfect situation, that perfect scenario.

Let's see, exactly what would it be like?

First, the frame would be made by someone I could communicate with, a racer maybe, one that does crits, track, and doesn't climb that much. But he'd climb more than I did so he could tell me, "Oh, you really don't want to do that, it would climb horribly".

Second, the frame would be unlimited as far as geometry goes. 44 cm seat tube? Fine. 58 cm top tube? Fine. I'd forgive the lack of availability of weird things, like a split seat tube that allows a 35 cm chainstay, but for all round tube design possibilities, they ought to be available.

My fantasy numbers include the following (assuming a reasonable 73 degree head tube angle):

1. 44-46 cm seat tube, as short as possible and still fit in a tall bottle on the seat tube, with room for a pump or a Down Low Glow just above it. This would let me clamp my seat post in a workstand (a normal one). It also feels better in general, the shorter seat tube.

2. A seat tube angle that allows me to move the seat-tube-slash-top-tube junction point forward by 2 cm on my 52 cm frame. This would let me center the saddle on the post, not slam it all the way into the stops.

3. A 58 cm top tube, maybe a 56 based on the fact that the top tube will be 2 cm forward based on #2 above.

4. At most a 12 cm head tube, maybe an 11 cm one.

5. BB30, so I can keep my mega-expensive SRM cranks, and so I'd have a lighter, stiffer bike.

6. 1.5" lower headset race, so I can use a Cannondale fork (I think they rock the house).

7. A non-noodle frameset.

8. Shorty chainstays so my rear tire stays planted with the long front end.

Finally, price. I can't afford a $4000 frameset, and I seriously doubt I'd ever buy one anyway. It's my "low buck, high performance" mindset, the functional way of approaching things. I appreciate handmade things, like a 1955 Aston Martin. Things of beauty, incidentally, with gorgeous aluminum bodywork.

But compared to a modern sports car? Or even a modern "sporty" car?

Fuggitaboutit.

Give me parallel A-arm front suspensions, a sophisticated multi-link rear, independent on all corners, big honkin' brakes, and a smooth, efficient engine mated with a smooth shifting transmission. My car illustrates that point, at least the blue one does. It's a low-buck way of having fun driving a car. And it doesn't have very much of that "old fashioned craftsmanship" in it, just good design and proper procedures. The body may look sleek, but it was pounded out by robots, not artisans.

Heck, my car doesn't even have a throttle cable! It's got an electronic wire attached to a computer.

Anyway, my point is that I don't need the exquisite workmanship of the frame building "masters". Give me a frame with the right geometry and durable construction and I'll be happy.

And of course all that could never, ever happen. I felt safe in my little dreamworld.

Then, to my utter dismay, RTC let it slip that there's a framebuilder that offered something like that stuff above - Tsunami Bikes, out in the west somewhere. They make aluminum frames, from $600 to $1500+.

And they do custom geometry.

Okay, I can handle $600 framesets to start. I can handle the $50 upcharge for BB30. I'm good with aluminum tubing, because as I've written before, fit > material. Look, if it was good enough for Tom Boonen, it should certainly be good enough for me.

So I'm good with the basics. What's the custom geometry upcharge? I was figuring at least $300 or so, based on conversations with frame importers and such.

So I emailed the folks, half seriously. I don't want to waste their time, and if the frame ended up at even a paltry $1000, it'd be hard to justify in a cash-strapped environment.

I got a response. Things looked good, too good even. I called the guy up. We talked on the phone.

$600 is the frameset price, built to whatever geometry agreed upon by the builder and buyer, painted some normal range of colors.

NO upcharge for custom geometry.

Since I want to keep my BB30 SRM, and I like BB30 anyway, I'd want BB30. $50 upcharge.

Now we're looking at $650.

For a full custom, BB30, custom painted frame.

Well now.

Not only that, I could take delivery just before my California training camp. Now wouldn't that be the end all? 30 or 40 hours on a brand new frame, just enough time to really get used to it.

I spoke with the missus. She gave approval.

So next I'll be visiting the local shop, one that has a fit bike thing on the floor. I'll experiment with sizing and report back to the builder.

And we'll see what happens from there.

Tuesday, June 03, 2008

Equipment - I Want This Bike!

The BIKE

So as not to freak out the missus, no, I have not tried to get one. Yet. But, man, talk about a bike that would fit yours truly.

52 cm seat tube. Not a big deal - I have one now.

58 (!) cm top tube.

Holy smolies. That's 5 cm longer than my current top tube. I might even go down to a 12 cm stem! Maybe even an 11 cm stem.

And it's stiffer and all that.

Look, the mold's already there. It wouldn't take much to just, you know, lay a few pieces of carbon in there, some resin, do whatever hocus pocus they do, and then borrow a bit of carbon fiber oven time to cure the thing.

Heck, it's made in Pennsylvania. That's only, what, a 7 or 8 hour drive away? I could do the lay up. Just give me some of that carbon fiber... wait, I could even buy the stuff. Well, I could at least pay for it. I think you can buy that stuff on the internet. If you can buy steroids, you should be able to buy carbon fiber.

Then I could do the work in the Bedford factory. You know, on the real workers' lunch hour. They'll be munching on sandwiches or going on their ride or doing both at the same time and I'll be carefully laying down one of hundreds of pieces of carbon into whatever a mold is.

Or however all that works.

Abracadabra and all that too.

I promise I won't reveal any production secrets to anyone.

Maybe they could justify it as a spare bike for Bennati. If that's the case, I'll hold two for him. Just in case he needs a bike in, say, the Nutmeg State Games. Or whatever other Pro race he might enter in the area. If he does one of those big races we could put one of the bikes on the team car, the other on the neutral support car. And afterwards, for safe keeping, I could take care of the bikes.

For safe keeping, of course. I could even bring myself to ride the bikes, to make sure everything keeps working.

So, Cannondale, what do you say?