In a comment to a prior blog post I paid tribute to Leonard Nitz as an inspiration for bar end shifters. The reality is that there were a number of riders in the New England area (Nitz was from NY so he'd have seen these riders) using a right side bar end shifter. Some used both right and left, but for us "crit guys" the right side was all we needed. For the left side we just used the simple and straightforward downtube shifter.
However, for me, locally, the real inspiration came from my teammate Mike Hartley. He's the guy that taught me a ton of what I know now. He taught me about leadouts. He demonstrated to me commitment in training, commitment to a race plan. For years he sacrificed his own chances in races so he could help me instead. I distinctly remember two races where he blew up trying to keep me at the front, apologizing profusely as he drifted back inside the last lap of the race (Meriden and Danbury). In other races his efforts helped me place well. I remember Cheshire Crit in CT particularly, and Montague in MA, the first race where we worked together as a team.
To be more complete I have to say that Mike and Lou Kozar were the two guys who inspired the bar end shifter. I wanted to be like Lou - he'd gotten second in the state RR the year before I met him, he was a Junior, he built my first race bike, and he got me set up equipment-wise so I could go racing. Lou, though, got more involved in the shop and eased up a bit on the racing. Also he was a stronger version of me. He was a lot stronger than me and his jump absolutely demolished mine. I'd only have a chance if he wasn't training - I had to do longer sprints to beat him. At any rate when he raced with me I knew my place and it certainly wasn't the lead sprinter spot.
Mike, though, he was irrepressible as a racer-tinkerer. He'd experiment with all sorts of stuff. And he came out and raced all the time.
For the bar end shifter he had a number of set up tips.
Remove Shift Lever Cover
First, remove the plastic shifter cover. The Suntour bar ends came with a hard plastic shift lever cover (the same goes for the Shimano levers). It numbed the feel of the shifts, giving you less direct contact with the bike. In the days of Benotto tape (it's only a bit better than a layer of electrical tape on the bars) and super thin leather gloves, "feel" was everything. You had to rely on yourself to make good shifts, to notice that there's a tick in some bearing, and having the bike connected to your raw nerve endings was a great way of knowing your bike. It wasn't like it is now, where you're sort of riding an SUV that happens to handle pretty well.
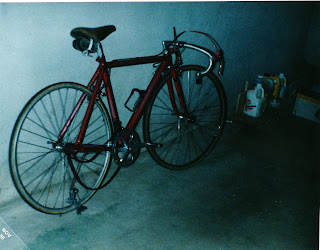
Bard end shifter with rubber cover still on.
This is a 1985 frame that I think broke by 1986.
Drop outs were not replaceable back then.
Note tubular tire strapped under the saddle.
When I first started racing I was afraid of changing actual parts. Changing out a part, fine. Altering an actual component, no way. It took me a while to simply slip off the shift lever cover.

You can see the texture on the shift lever here, sort of a ridge to catch your pinkie or ring finger.
The plastic cover hid it, making it less "grippy"
From my post here.
Second, if you really wanted to, you could drill out the aluminum shift lever. Holes in aluminum levers fulfill two purposes, one more than another. You might think that holes in, say, a brake lever would help reduce weight, however minutely. You'd be right, if you were talking about homemade holes. But production holes, like the ones in Campy's Super Record brake levers? They were there for grip in the rain. Drilled out Super Record brake levers were actually heavier than their non-drilled out Nuovo Record counterparts.
However, if your levers were slick with water, the holes helped give you traction. It's like the diamond plate metal things on the trucks and such. The raised diamonds give you some semblance of traction.
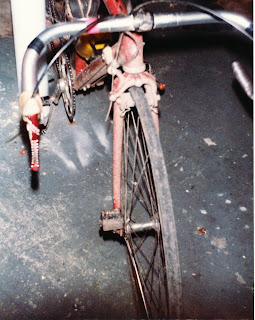
Modolo Pro brakes, factory drilled.
Typically the aluminum was thicker on drilled out levers, increasing weight or keeping it the same.
Note the WOODEN cable stop on the downtube - I carved it myself.
Finally, the ultra thin Benotto tape. Nowadays you'd probably be sued for offering such a tape.
At home we didn't have a good drill, I was scared of ours, and I really didn't use the drill press at the shop, so my bar end lever remained undrilled. Therefore no pictures as I don't have a picture of Mike's shifter.
Cut Bars
Third, Mike cut down his bar so that the shift lever would sit in the palm of his hand. One major disadvantage of a normal bar with a bar end is that the bar end is about 3" away from your hand. It's fine if you were on a touring bike, which is really what bar ends were meant for, but in a crit, with 200m to go, you didn't want to be sliding your hand back 3" to shift while you were sprinting your brains out.
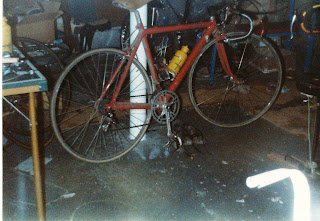
Before I cut down my bars.

My cut down crit bend bars with Suntour shifter.
From here.
Because I was cutting the bar for shifter placement I cut less off the left side of the bar (no bar end shifter there). I cut at least one bar evenly, meaning the left side was way too short. I don't remember what I did but I think I raced with a "dummy" left bar end mount so my hand wouldn't slip off. Or I cut the bars more and turned them upside down to make a "time trial" set up.
Knowing me I probably did the latter.
When I went to Ergo levers I didn't change bars right away. Therefore I had to race with an empty bar end mount on the right side. When I got new bars I cut them down for no bar ends so I was okay.

Note the empty bar end mount on the right side, even though I have Ergo levers.

What I cut off my bar currently; it's conservative as you can always cut more.
This is an FSA Wing Compact bar.
Retrofit Index Shifter
Fourth, Mike actually did retro-fit a downtube Shimano index shifter (SIS) onto a non-indexed bar end mount. It didn't have great ergonomics because a downtube shifter was much longer than a bar end shifter. His shifter ended up sticking way down. I don't remember if he cut it down or not. When I first saw it I was impressed with his work but not with the appearance.
It involved using a downtube frame adapter specific for the SIS shifter, mounting it to I think a Suntour bar end mount. I remember a bolt going through the bar end mount, one that wasn't the right one, probably a retrofitted Cannondale downtube mounting thing. Most frames had their downtube mounts brazed on so they were useless for retrofitting onto a bar end mount. Unless you brazed one on, I suppose.

How an SIS shifter (#7/#13) mounted to a downtube boss (#8)
Lifted off a forum.
However, Cannondale's aluminum tubing meant that the downtube bosses were bolted on, with a long bolt connecting the left and right downtube mounts. Unscrew them (from a trade in frame program that existed back then) and you'd end up with two mounts for downtube shifters that were actually threaded in the back. Perfect for mounting to some obscure place.

You can see the upper left piece is a downtube boss, like #8 above.
Mount the black piece onto a friction bar end mount and an index shifter would fit on it.
The long bolt reaches between the sides of the downtube.
This was lifted off a forum and the poster said they got it from Cannondale.de.
(On an aside we half joked about moving shifters around on a Cannondale. It'd be an easy process, just drill holes and bolt on the downtube mounts. You could have theoretically mounted the shifter further up the downtube, along the top tube, where ever. I'm sure it would have been possible (still is possible?) to mount the downtube bosses to a set of aero bars so you could have your shifters on them. Likewise, because the threaded bottle bosses were rivnuts, you could mount extra bottle mounts where ever you wanted, or, conversely, use the threaded inserts for other purposes, like anchoring a fender permanently to a touring frame. I remember doing this for a customer who took his bike all over the world, we went a bit nuts drilling out his frame and installing "permanent mounts" for various accessories.)
Flip Left and Right Mounts
Finally, when Shimano's index bar end shifter came out, the shift lever mount mounted the shifter below the center of the bar. This meant that the shifter was below where it would be compared to a Suntour shifter. With the whole "shifter in the palm of your hand" philosophy this was less than ideal, and in fact it was horrible. Although I was suitably impressed with Shimano's index shifting, the fact that the shifter sat so low (and also that it would have cost some money) kept me on Suntour. As someone that hasn't used Shimano drivetrains who knows what would have happened if I'd gone Shimano at that point?

Shimano SIS bar end shifters.
Note how the center bolt of the right shifter (top) is below the center of the bar.
Mike's solution was perfect. He flipped the left mount and installed it on the right side of the bars. He had to do some drilling and such but after a little bit of experimenting it worked out. Now the shift lever sat higher than the centerline of the bar, sticking up maybe a quarter inch. His bar end shift lever was literally in the palm of his hand.
For me it was too much. Honestly the budget was the big part because to get into Shimano's index shifting system (key word: system) you had to have, primarily, their freehub rear hub. I had no such hubs in my own inventory, nor any cassettes. Therefore to get into SIS I'd have had to spend money for shifters, the rear derailleur, rear hubs (for the cassette hub - I had all freewheel hubs), cassettes, cables, housing, chain... I just stuck with my Suntour stuff. It was free because I already had the whole set up and it worked fine.
And then 1988-89 rolled around and Shimano's STI levers became widely available. I saw an immediate effect at races, or, more specifically, in sprints on training rides. I used to be able to take advantage of my "shifting while out of the saddle sprinting" but now that advantage eroded pretty quickly. Not only that but STI worked when climbing out of the saddle on the hoods. Now I was the one being left behind as riders shifted gears in the middle of a slope.
The real kicker were the SUNY Purchase Tuesday Night Sprints. I used to be able to clean up there, out jumping the stronger sprinters and out sprinting the stronger jumpers. If you could jump better than me I'd out sprint you after shifting into a higher gear. If you could out sprint me I'd out jump you by jumping in a lower gear. When STI showed up suddenly it wasn't quite so simple. One rider started regularly beating me when he didn't have to jump in the same gear he sprinted in - Eric Min. He'd go on to found Zwift.

Sprinting at SUNY Purchase, or, more precisely, sitting up just after winning a sprint.
Anyway, that's my experience with bar end shifters. I was lucky to start racing in an era where one could pretty easily tinker with their equipment. It was a bit more modular, a bit more "parts put together". I used to do all sorts of stuff with my shoes, mainly drilling out new cleat mounts and adding straps to lace shoes (which makes me wonder what the attraction is to laced shoes again). I fiddled with hubs and brakes and rear derailleurs. I used the shop facing tool to steepen my head tube angle a bit, "facing" the bottom part of the head tube and removing a solid few mm of material off the bottom of it.
Currently it's not like that, with more integrated stuff, carbon stuff, etc. Even switching derailleur pulleys is sort of a big deal - back then everyone did it. And I highly doubt you'll see people altering Ergo lever mounts and such, it's just not worth it. There's very little optimization going on.
Or, perhaps more accurately, now that I think of it, perhaps it's more that I no longer have the time or inclination for such tinkering.
In a way that's sort of sad.


 Posts
Posts

